Monday, May 19, 2014

May 19 - Genius Hour Day One

With just a few weeks left to school I assigned my 6th graders a "Genius Hour" project.  Since I have had them for 2 years they have a pretty good idea of what my expectations are... so I felt pretty comfortable about this process.  I explain that their final project had 3 parts:
     #1.  A question (what do you want to learn about in regards to art?)
     #2.  Research (go find the knowledge... use books, internet, personal connections, etc)
     #3.  Present their knowledge to their classmates.

While I can't say that every project was amazing; I was pretty impressed with most of them and blown away by a few. Here are some from the first day of presentations:
a realistic eye
minecraft mask
duck tape creations
more duck tape
a cartoon drawing of her favorite video game
an entire notebook of cartoon foods
learning how to decorate a cake (it tasted really yummy also)
cartoons ( she wasn't allowed to draw someone that existed so she mixed characters)
research notes for the PowerPoint presentation she created about optical illusions
fingernail art
rubber band car racing across the room
a model plane... he had to research the plane since it was a kit
a handmade chalkboard
a really awesome flip book  (I will keep working on uploading the video of it)

Friday, May 16, 2014

May 16 - The "Original Selfie"

Earlier this year iPad Art Room had a post "Don't Hate the Selfie" and it was great.  The visual alone inspired this years 6th grade portrait project.  I started the lesson with a presentation that showed some pretty famous "selfies" updated.

Students started by going to the computer lab and finding/researching an "old school selfie."  They had to find an image they liked, research the artist who created it and plan how they would modernize it.  

Then we came back to the art room and they worked on griding out their portraits.  They drew the grid on their paper and we had some standard grids printed out on overhead transparencies for them to lay over their photos.  They spent 2 weeks drawing out their images and deciding how to modernize their image. 

Next they decided what to do about finishing their project.  I gave them the opportunity to choose from oil pastel, tempera, watercolor or colored pencil to finish their images.  They were working so hard and they were turning out great so I decided to mat them.  I cut each portrait to 11x17 and then they selected a colored construction paper to serve as the mat.  They also finished each project with a tag listing the name of the artwork, the original artist and the date of its creation.  They added some information telling what they did to modernize the image. 

Courtney did a great job so here is her's step by step:
Marcanottio Bassetti's "Portrait of an Old Man with Gloves"
Courtney's Old Man with iPod
Information tag for the portrait
Here are few of them with tags:
Alicia's Girl with Beats
Ali's Minecraft Boy Blue
And a few close ups:
Tech Savy Grant Wood?
Beethoven and Patrick?
Pablo Picasso with ear buds?
Henri Matisse aka the Terminator?
iPhone Selfie Loving Frida Kahlo?

Check out more at Artsonia...


Thursday, May 15, 2014

May 15 - Following their lead...

Awhile back I handed out a "box monster" project to my 5th graders.  I started by handing out a box template (like this one) and starting at the top they were to create hair, face, toes and tail with arms on the side.  That was the extent of the directions.  My original ideas was for them to create a "minecraftish" city for my display case to welcome next years students.
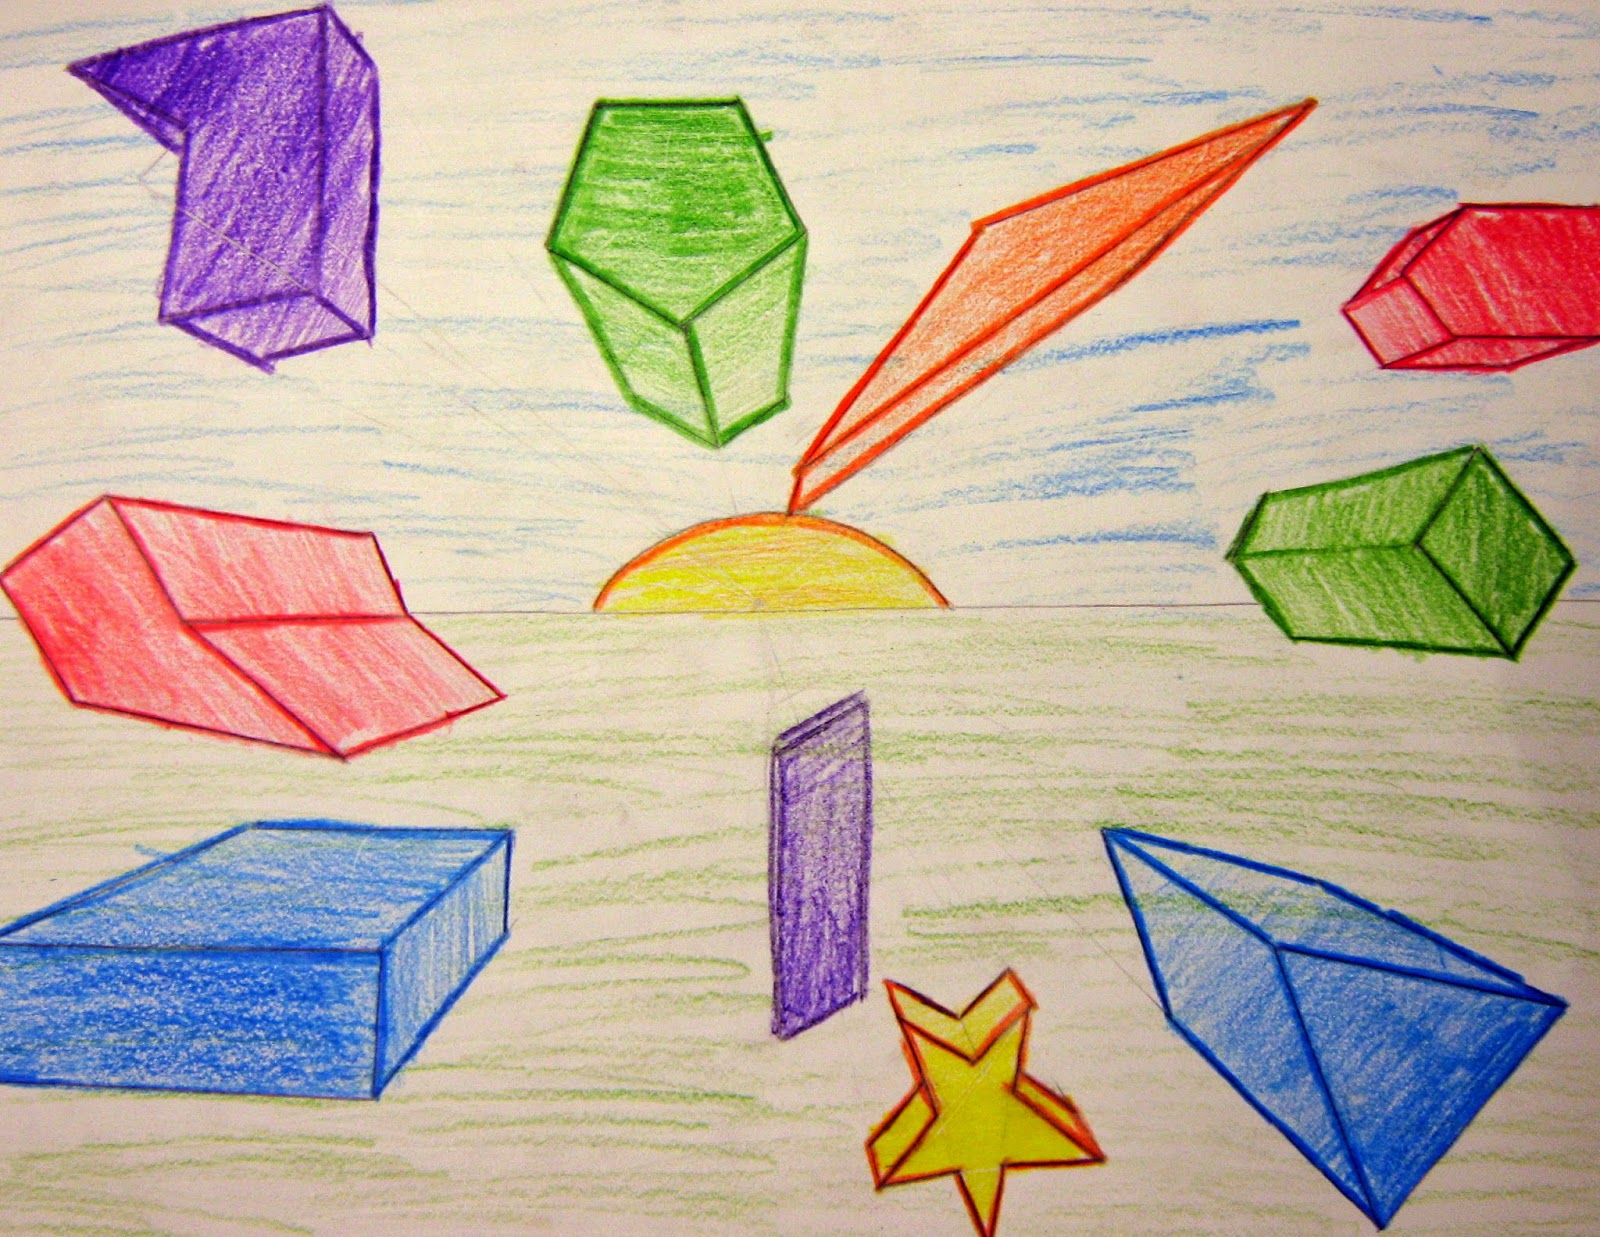
Fast forward to our perspective drawing lessons.  We are practicing drawing perspective by working through how to draw cubes.  My idea for their final project was 10 boxes with a connection of some kind; like these that my first class completed.

(bet you can't tell that I said "like the trunk of an elephant" during demo)
My second class was missing a day for our track meet so they just had to do 10 boxes or 5 letters... like these:


On Monday they came in and my last two classes were ready to rock.  While we were drawing in the first class, one of my students who really quickly got perspective started to turn their cube into their box monster. It was like a divine intervention... what a great idea.  For the last two classes I changed up their assignments.  They needed to draw their box monster in perspective, create an environment for them to live in and color neatly.  

I LOVE THEM!  
watch out for the creeper behind you!


why did the chicken cross the road?
Here are some that I failed to take a picture of their box monster, but they are some pretty cool drawings!


 While photographing these guys I realized it could even be fun to make a short film with them...


Wednesday, May 14, 2014

May 14 - Back in March...

Back in March we did a project that was based on the saying "March comes in like a lion and goes out like lamb."  We discussed how this saying came to be (it is really about astrology) and how true it is in Nebraska. On March 1st we were at 12 degrees and it was snowing.
March 31st it was 63 degrees and the sun was shinning. 
I then handed out some papers that had 4 photos of sheep and 4 photos of lions on them.  Each student was given a plastic piece of overhead material cut to 3x4.  They used transparency markers to trace out their lamb and lion images using shapes where possible.  They then drew these shapes onto their art papers to create their lion or lamb.
The next class meeting we looked at the art work of Ron Burns.  We discussed the bright and beautiful colors he used to draw realistic looking animals. They then worked to complete their drawings of a lion or a lamb in the style of Ron Burns.
ROAR....

Much Nicer...

This project was part of our material rotation so that means one day worked with watercolor, one with tempera, one with oil pastel and one with chalk pastel.  I just was so happy with how all of them turned out.  If I was doing this again next year I would make sure I have this book from the library to connect it with literature. 


Tuesday, May 13, 2014

May 13 - Doodle for Google

If you have never done Google's "Doodle for Google" with your student you should really think about it.  I love all that Google does for this contest and the prizes are AH-MAZING!

I always start with exploring the homepage.  They always have some great resources about the theme.  This year they even had video's of the official Doodlers talking to the students about how they work through their ideas, research, collaboration, etc.

We then discuss the theme for the year (this years was more challenging than years past).  I have my students start by collaboratively brainstorming at their tables.  Then each student starts to work up an idea.  This step goes home as homework.  The next week we come back and peer review their ideas.  They make any necessary adjustments and then start on their final image.  I give them two weeks to work on drawing out their final image and finishing it with coloring/shading.

The final step is to have them write out their explanation statement.  It is a place for them to explain their image (I think this is important part of the Doodlers choice).  Since I have 300 students I chose my top 30 and enter them into the contest.  I have yet to make a state winner but hey, if we never enter we never will.

Here are a few of my kiddo's drawings from this year:
My invention would have the army fighting on Earth while the people would move to Neptune.  There would be a rocket between the two planets for food, water and heat.

My invention is better than just making food.  We are making talking food.

My invention is a dome that can allow people to live in outer space.

This amazing invention allows one earth-roaming creature to communicate with another.

I made a teleport because travel would be easier and it would not take as long.
You can check out more at Artsonia.